Showing posts with label DIY. Show all posts

Tuesday, September 29, 2015

Inexpensive Gifts: other ideas for digital downloads & printables

I'm not sure if you are an Etsy or Instagram shopper, but several times a week I find myself interested in yet another art print that is usually a digital download (aka print it at home yourself). We are definitely out of wall space in our home which means I never gave these awesome prints a second thought, until now. 

Recently I found a few that I just couldn't say no too and had to figure out a way to do something with them. I came up with three ideas: notecards, a dry-erase to-do list, and a non-traditional picture frame collage. 

First, notecards are a fantastic way to use printables! You can purchase two or three different printables and create a whole set of cards. If someone in your family is an avid card-giver you could really get serious with this idea finding printables for various occasions and creating a whole set of these. I grabbed a printable from one of my favorite go-to shops for cute and inexpensive printables, Pretty Print Shop. Once you have the image I inserted it into a Microsoft Word document. I changed the margins of the page to "narrow" at .5" all around and then resized the image until two would fit on one page on the right side of the document. 


Now I usually prefer Microfost Publisher for these kind of projects but went with Word here as I think that is what most readers are comfortable with. 

I printed four pages of this document. Two on cream cardstock and two on white cardstock. If you think you might start doing this often keep an eye out for the sale at Michaels when their packs of cardstock go on sale for 5 for $10. I've never seen a better sale and it actually happens quite frequently! 

Alternating white and cream gave it a fun look:


Second idea can really be adapted in quite a few ways. This is for a dry erase list board. This is really as simple as buying a clear glass frame, or any frame really, and putting a printable alongside a plain lined piece of paper.  

I love the idea to potentially use this as a way to memorize scripture as well. If you're looking at a to-do list daily, glancing at scripture each time is a great way to ground yourself when those tasks start piling up. I didn't glue anything down in these frames so it would be easy to change out every so often. The picture below shows one of my all-time favorite printables from Vine & Branch Design. 


What I did do is place a piece of white cardstock behind my lined paper to make it appear less transparent. You could use this for a grocery list, prayer list, to-do list, birthday list, etc. 


And you can always put paper flowers on anything!! ;)

Last, but potentially my favorite because of the adorable baby making an appearance, is a way to make a more personalized and less traditional picture frame gift. 


First of all, I am so in love with that baby and that print about motherhood from Echoes of Mercy. So what better than to put them together? You could look for prints about particular family members, locations, bible verses, special occasions, etc. A few other ideas that come to mind is a picture of a cityscape or landscape paired with an engagement picture or graduation picture at that location, a printable about what a name means paired with a newborn picture, a printable with a bible verse about family and a family picture, etc. See?! The possibilities are endless! I put this in the same type of frame as the second idea here, but you could find any frame you desired to dress this up a bit more if you wanted to. 


More about the shops: 

Kind, Thoughtful, Thankful print - Pretty Print Shop 
Website | Etsy Store | Facebook | Instagram: @prettyprintshop

Fruit of the Spirit print - Vine & Branch Design 
Etsy Store | Facebook | Instagram: @vineandbranchdesign

Motherhood print - Echoes of Mercy 
Etsy Store | Instagram: @echoesofmercy


Thursday, October 10, 2013

Halloween and Fall Decor: Glitter & Gold

I don't really like Halloween or the colors orange and black, but I do love fall! I'm never inspired to decorate for fall but I think this year I might try to do a few things here or there.

I found this pin on pinterest and checked out her blog, I love her idea of decorating with gold, click the picture to go to her blog. I love the gold lanterns in the bottom right with small pumpkins.

EatSleepDecorate.Blogspot.com
Also, I'm really liking white pumpkins, who knew they existed:
piles of orange and white pumpkins
I think I want to try something I saw on Pinterest with gold glitter mason jars, but on white pumpkins, these are from Etsy - click to go to the shop: 
                                          3 Shining gold glitter mason jars vase centerpiece by JaxandJos
Now, I remember how the glitter from my 10th grade homecoming dress stayed in my car for approximately 8 years so I'm not 100% sure if I'm going to attempt this, but I think it could be really pretty so I might try! I just need to find where I can get one of these white pumpkins, or three. 
Of course, I'm acting like this is a novel idea - but then I remembered I already liked gold glitter last year when I spray painted the sticks and pinecones. By the way, I still love these and I actually have all of the gold glitter sticks in a large vase on our table right now. 
I'll post an update when it's done, I'm sure it will be completely different from my original ideas - but that's ok!

Tuesday, October 8, 2013

DIY Painted Lamp with Hot Glue

It has taken me a month or so to post this, but this is one of my favorite recent DIY projects. All you need is an old lamp, a paint sample and a hot glue gun. Admittedly, I was only about 10% sure this project would be successful, which made it even better when it was! 

I picked up a paint sample at Lowe's and it is more than enough paint to cover the lamp. 

I painted the lamp, two coats of this color.


Then, the tricky part, I used my hot glue gun to draw a design all over the lamp. I started pretty complicated here and it takes some practice. Something abstract without straight lines is best as it's practically impossible to get your glue gun to draw straight lines. This has lots of swirls and flowers.


Once you're done covering it with your hot glue, take time with tweezers to remove all of the small strings of glue that probably landed everywhere while you were designing the pattern. If you don't remove them, they get all tangled in your paintbrush and it looks like a mess. So, it's worth it take the time to pick all of them off and then re-paint over the hot glue. I used two coats here. 


Wednesday, August 21, 2013

DIY Paper Flower Wall Take 2: Part 1

It was definitely daunting to start over with this again now that I know how much time and effort went into the first one - but for those of you hoping to make one of these, it is definitely worth it!

Recap for those coming to this post first:
Original Paper Flower Wall
Paper Flower Wall Take 2

I started with two main supplies this time. A pack of 200 coffee filters and a pack of 100 sheets of thick cardstock paper. Last time we used any type of cardstock or thick paper we found, and honestly a year later the flowers are still keeping shape pretty well! This time, I decided to try a thicker paper. (Mostly because it was all they had and yes, that is how most of my decisions are made!) I bought cardstock from Michael's that says "heavyweight" on it and also says 110lb. Now, did it weigh 110 pounds? No. So why it says 110 pounds, got me. But I bought it anyway. I'm also going to keep track of how much this wall is costing me as I make it, which is something we didn't do last time. So the paper was $12.99 but with my 40% off coupon, seriously don't even walk into Michael's if you don't have the Michael's coupon app on your phone!!, it was $8.00.  Then the coffee filters from Target were $1.00 for 200.

So, first step - making the small, filler flowers. This can be a little discouraging and I did this last on my previous wall. I decided to start with this first this time around. When you are finished making large flowers there are often gaps between the flowers, some of you may not mind that - especially if your canvas is white and your flowers are white - I however, am OCD and need to have every square inch of this covered. So, under some of the large petals that poke up or in between two odd shaped flowers you need small filler flowers to fill the gaps. The coffee filter flowers are the best for this.

Each coffee filter flower takes 6 coffee filters: 2 cut for the base layer, 2 cut for the middle layer and 2 cut for the top layer.

Base Layer: Fold the coffee filter in half, three times.  Then cut the shape as shown below.
Middle Layer: Fold the coffee filter in half, four times. Then cut the shape as shown below.
Top Layer: Fold the coffee filter in half, four times. Then cut the shape as shown below. 


You need to fold and cut two of each layer to make the flower, I suggest you keep all of the leftovers, just wait for the following step. Hot glue all six of these on top of each other, placing a dab of glue between each layer in the following order: 2 base, 2 middle, 2 top. Now all that is left is the center of your flower.


I used the left over trimmings of my coffee filter to make the center of the flower.  After you cut out one of each of the layers, your leftovers look like this:


You can use any that you want, but I used the one in the bottom right (the trimmings from the base layer). I grabbed this and squished it together and it instantly looks nice because of the style of the coffee filter itself. See below:


Then, with no real method to my madness, I used way too much glue and covered the bottom of this and pressed it onto the flower. Alternatively these could look really cute with buttons in the center, circles cut out from a different color paper, etc. 


The pack of 200 coffee filters will make about 33 flowers which is a really great start to filling your flower wall. Now, it obviously isn't going to look like much progress is made, but you'll be really happy you have these towards the end of the project. I am planning to use two full packs and make about 60 flowers. 

So far for today: total of $10 for a pack of cardstock (to be discussed in Part 2 coming soon - subscribe to follow by email to get my updates as I post them throughout the next few weeks) and two packs of coffee filters. 

Next Step: Large Card-stock Flowers
Final Product: It's finished!

DIY Paper Flower Wall Take 2!

The most popular page on my blog is the paper flower wall I created for our wedding. That wall was created with magnets and three large magnetic pieces of sheet metal. Now that we've moved, any requests I get about the flower wall are really just not feasible because of the travel and logistics. However, I was recently asked if someone could use the wall at an adoption party they were throwing for a friend (more to come on this). I wanted to be able to provide the wall, but knowing that I just wouldn't be able to drive to go get it and then transport it made me think it was time to create another one.

This time I'm going to make the wall on canvases with hot glue.  It will still be in three segments like before, but the canvases will be up on artist's easels. This is still going to be large and create a statement, but it's also much easier to transport, store and use in my home!


The canvases are the following dimensions 24"x48", 36"x48" and 24"x48".  They are really quite substantial and when I lay the three of them together they cover about a 7 foot by 4 foot space. I am planning to stand them up tall - so they will be 48" high PLUS the height of the easel which I'm hoping will make the whole thing right around 7 feet tall. With the three separated and then placed on easels it's also going to give more flexibility for the set-up. I'll be able to arrange them in one straight row either lined up flush, or with a gap between them to make it appear larger. I'll also be able to position the two end canvases at an angle which is something I thought would have looked interesting with the last wall, but wasn't possible.

I'm planning to post updates here with a DIY on each flower included and finish up with how I arranged them. Also, this time the flower wall isn't going to be bright white this time, it will be soft white and ivory. With the last wall, pictures came out great but sometimes it was difficult to see the definition depending on if you were using a flash or what the lighting was like. Once it is finished I plan to hang it in my office covering an entire wall when it isn't in use, which I'm really excited about!

Since I'm starting all over again, if you have any suggests please comment! Love to hear what you guys think :)

Updates Posted Here!
PART 1 - Coffee Filter Filler Flowers
PART 2 - Large Card Stock Flowers
FINAL RESULT

Friday, January 18, 2013

DIY: Holiday Decor....2 months late. (Tree Skirt, Pine-Cone Wreath, Holiday Vases)


On a random day of motivation, actually the day after Thanksgiving, we decided to create and put up all of our Christmas decor in a few hours. Seeing as we didn't have any, that involved a trip to Michaels. I had been excitedly "pinning" a multitude of DIY holiday crafts, but when the time came I had to settle on just a few. 


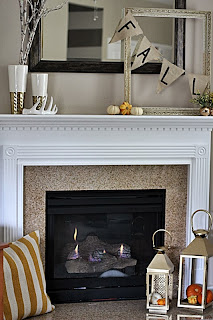
You might recognize the letters over the mantle from the wedding:


We had probably a hundred leftover glass vases of all sizes from the wedding centerpieces and picked three to create holiday vases. These were really simple, I wrote words onto the vases with my glue gun - "joy, peace, and noel." Make sure you practice these first....... Then spray painted the vases after the glue dried. Don't spray paint on the porch of your apartment......... (Lots of .............. here, learn from my experiences ;) or for most of you who already have enough common sense to not spray paint on your apartment deck, porch, 5x5square - don't follow my example.

Then, my favorite part are the sticks spray painted in glitter. We used three bottles of gold glitter spray paint, if you really want them glittery - you'll have to use about the same. We found these sticks behind the in-laws' house and my little sister-in-law thought it was hysterical that we were collecting sticks to cover in glitter. I was excited to show them to her on our mantle and she responded with a monotone "cool" and "is that a guitar over there?" Anyway...

We spray painted the pine-cones as well and I really liked how those came out. We were going to collect some from out front, but Michael's sold a bag of about 30 for $1.99 and they smelled like cinnamon. No bugs and a cinnamon smell? SOLD.


With the pine-cones I made a .....uh....cluster of hanging pine cones? Anyway it looked pretty, just didn't sound as cool when I tried to type it. This was really easy, and I was planning to hang on our front door, but I wanted to look at it inside instead of the neighbors getting to see it. (Well, that was honest.) We're still working on a door mat and wreath...no one knows we live inside the apartment. You can see the pine-cones on the right of the mantle:


To make this you'll need approximately 7-12 pine-cones, a spool of thick ribbon (the kind with wire in it...my craft vocabulary is slowly growing...is best), and a spool of thinner (wire) ribbon as well. First step was to cut 2 foot strips of the thick ribbon - I cut as many as the spool of ribbon could make. Save one for the bow you will tie at the very end. Then you fold an inch of the ribbon in order to create a flat surface to glue to the top of the pine-cone. See below:

Then, use your smaller ribbon to tie bows.  Glue the bow on top of the folded surface of ribbon (shown above) to hide it.

Do this to as many pine-cones as you would like.  The tricky part is to then lie all of your ribbons on the ground and gather them together in a "pretty" way. I actually made about 12 of these, but when attempting to put them together, it seemed that 7 was the perfect number. Because the ribbon has wire it in, it will mostly stay in place and make it a bit easier on you. The, tie the ribbon you saved in a bow around all of the extra ribbon from the pine-cones. We used a push pin to tack this into our mantle and it stayed and kept its shape the entire winter season.

Last but not least, I attempted to make a tree-skirt out of felt. I cut a large circle (yes it is way too big for this little tree, but in the future when we have an actual house and big tree....!) with one slit from the edge to the center and then cut out felt flowers to glue on.  My goal is every year to make another whole row of felt flowers around the edge in a different shade of white, cream, or ivory to make it very full and 3d. It looks a little bare right now, but it will grow quickly.  The felt flowers were simple, you can tell the shapes that were cut by looking at the flowers since they are mostly separate and easy to see. (For now!) Also it was all hot glued.

Another handmade gem from our special Aussie friend were the ornaments, check this one out:
We love them, and her ;)

Anyway, with the rush and excitement of our first married Christmas and all kinds of new dynamics and traditions we really liked having the decorations up early to have a cozy (naturally 700square feet is cozy) place to come home to!

Wednesday, January 9, 2013

DIY: Halloween Costume...3 months later.

So, after a long haitus of managing our first married holiday season, a new job and the husband's law school application process I am back. I'm upset I didn't keep up to date with the most recent DIYs especially since they were mostly all holiday themed. Never to late to share. Especially this first one...

For Halloween our friend was having a housewarming party/Halloween party and I can't begin to explain how much this particular friend loves Halloween. We, on the other hand, never dress up or really do anything other than hand out candy at my parent's house whose neighborhood seems to be the Mecca of candy collection. (Seriously I'm talking like...300+ kids.) But, we knew it would mean a lot to her if we dressed up so we thought about our costume a lot in the weeks preceeding the party. Ok in the days preceeding the party...OK so in the DAY preceeding the party.

So, Friday night we head out to Target to gather our DIY costume supplies. Of course we do not grab a cart because we are only grabbing one or two things, and everyone knows when you walk into Target you always come out with just one or two things...or $70 worth of things you need. Anyway, empty handed we stop in at the ladies section and see some black tights on sale. Not the kind professionals wear (or apparently don't wear anymore?? seperate topic) to work, the kind tweens wear as jeans. So we see some of those on sale. I pick up a pair of XL - that will fit the husband for sure. He stares at me. We keep walking. We find some long sleeve black t-shirts on sale, one for me in the female section, and he got lucky - a waffle shirt in the MENS section. Things are getting a bit better.

Armed with our black skin tight suits we begin looking for our outer layer. We walk into the mens section and unknown to me, they only sell white tank tops, t-shirts, underwear, in PACKS. I haven't seen underwear or t-shirts in packs since mine had the Little Mermaid on them. Anyway, I  make some weird comments about the packages of intimates everywhere. Thing is, we only need two white tank tops and two whitie tighties.

Pause - yes I do realize I haven't told you what our costume is at this point.

Back to the story. Only needed two of each, and Target selling packs of not 4 or 5 but jumbo fruit of the loom value size 12 packs, oh and get this one extra for good measure. So a bakers dozen of whitie tighties is exactly what we don't need. To further complicate things, I obviously need a smaller size than he does and compromising in the middle just wasn't going to work. So, I grab a 13 pack of SMALL whitite tighties. I really thought they'd losen up to be honest...but you'll hear about that later.
Might I add that this 13 pack was really not the $2 or 3 dollars I was hoping to spend and I really just couldn't bring myself to walk into a thrift store looking for whitie tighties. Ok this is getting out of hand.

SO, our black spandex body suits and 13 whitie tighties in hand we grab a pack of white tank tops in his size - I'll find a random white tank top at home. So, our arms aren't that full...expect that bag of whitie tighties we keep trying to wrap up in the black spandex so no one sees us carrying. We then head over to the cosmetics section to grab 10 jumbo bags of cotton balls. Now here people, is where we needed a cart. But did we get one? No. Just like how in college we always, ALWAYS, carried in every single bag of groceries in one trip no matter how heavy or how few available hands we had. So, 10 slippery plastic bags of cotton balls that keep falling as we walk back to the register, our whitie tighties, black spandex and $80 later we are ready to begin our night...and it's already 9pm.

I lay out our materials at home:


We then grab my glue gun, Scarlett (since our last post and extended bonding over the holiday season I've since named her.) Scarlett and I go to TOWN gluing cotton balls on every single inch of the whitie tighties and tank tops. We had a system going by the end of the night, I glue a long line and he slams down as many cotton balls as will fit. At the end, I picked up our finished pieces to show off, realizing they now weight about 10 pounds more than before and have essentially turned into a suit of armour. Hot glue hardens, yes I was aware, but I wasn't REALLLLY aware. We set the suits down and figured we'd conquer the task of getting dressed...well...the moments before we got dressed.

The next day arrived and it was time to "slide" into our cotton armour. This was not easy. At one point Andrew had his hands above his head and the white tank top completely stuck over his face for a few minutes until I literally used every ounce of strength to grab it down. Same situation for me, except I didn't handle it very well....it felt a little claustophobic. So after that ordeal we finally realize how absolutely ridiculous of an idea this was. Too late to turn back now. We walk out of our apartment complex, at least I have a long black coat. Andrew has a short black coat but managed to fit some gym shorts over his very expanded cotton bottom. As we walk cotton balls trail behind us at least every 3 feet and wherever we stop and stand for a minute is a little pile.


It was the hottest car ride of my life, and poor Andrew was in size small whitie tighties covered in cotton balls with at least 4 layers on driving an hour to Gaithersburg. Worth it. We saved them if anyone would like to borrow. ;)


Wednesday, October 3, 2012

DIY Wallpaper Bookcase

So for this project I didn't necessarily see a Pin on Pinterest, although I'm sure about 9,999 of them exist about this idea. I believe the idea all started when talking to my co-worker about some of her ideas for her new apartment. We both moved into new apartments in the same month and have recently been sharing DIY ideas almost every day. She started a blog with her ideas also, which you should check out: Decore Dilettante. Anyway, I think she mentioned her idea of putting colorful wallpaper in her book case and I thought it was a great idea.

We bought a bookcase from Ikea in their "brown-black" color.  Our kitchen table and TV stand are both brown, so this brown-black was really dark. Of course we didn't consider shopping at places other than IKEA, because, well - why would we? We are 23, newly married with a new small apartment, IKEA's target audience.  Here is the one we chose.

So, then the next step. We all know what this is going to be...I called Barb. (For those of you who don't know her, she's my mom and a design diva.) I explained my vision to my mom and she informed me that wallpaper is actually pretty hard to come by and that she has always purchased it at Plymouth Wallpaper Outlet in Catonsville, Maryland. So, low and behold - my mom found the perfect wallpaper for me without me even being there. I had wanted the plain white textured wallpaper that can be painted in a geometric pattern. This is what she found:


This project was just as simple as putting the bookcase together, but before nailing on the back you wallpaper it first. 

First we cut the wallpaper into two pieces so it would fit on the bookcase back.  We decided to put the seam in the middle because it was a geometric pattern and would easily line up. Here is super mom cutting the wallpaper:


In order to activate the glue on the back of the wallpaper, you need to get the entire back wet but then fold it on top of itself so that the glue side touches itself and then it will activate. Here is a picture: 


We laid out the long sheet of wallpaper and then lightly folded the ends in towards the middle so that all of the glue was covered. Don't press on the creases. After about 2-3 minutes we unfolded the wallpaper, turned it over and placed it on the back of the bookshelf. 

You should technically wait for the wallpaper to dry before hammering the back onto the bookshelf at 10:00pm on a weeknight while I'm sure everyone else in our apartment complex was sleeping....but.....anyway.  We let it dry for about a half an hour while I convinced my mom that watching "Call of the Wildman - LIVE ACTION" was a really great idea. She agreed....not really.

Anyway, after one episode of some turtle wrangling we put it all together. Actually - Andrew put it all together I need to stop taking credit for things I clearly didn't do...like hammer the back of this bookcase.


So that's it! Very easy project and it definitely lightens up what would have been a very dark bookcase in a small room.

Thursday, September 27, 2012

DIY Painted Rug

After moving into our apartment the DIY projects began almost immediately. Obviously I had pinned over 100 different ideas that all claim they are $10 DIY "quick" projects and we both quickly learned that most projects are at least double the cost and usually a few hours longer than expected. In all reality the projects that we've done so far have all been relatively painless and turned out pretty great! The first thing we did was find a rug for the living room.

Our apartment is obviously small...but we wanted to put a rug in the living room to separate the space. We had also just gotten a book shelf and coffee table that were pretty dark, so we also wanted the rug to lighten up the room. I had seen on a few blogs and pins the idea of a painted rug and decided to try it.

We went to IKEA and bought the ERSLEV rug, it comes in two sizes and is a plain white flat-woven rug.  I definitely recommend this rug, it is easy to paint, light weight - yet stays put on the floor, and also reversible in case you mess up. I bought the 5'11 x 8' 2 rug and it is a really great size for our apartment.

So, first order of business after purchasing the rug. Invite my mom over.  The conversation went like this:

Me: "Hey Mom, what are you up to after church today?"
Mom: "Oh not much, you know the ravens are on at 1:00pm so we will probably be watching that at home and making some lunch."
Me: "Great, well how about you guys just come over and you can see the new chair we got and watch the game with us."
Mom: "Ok that sounds like a great idea, we'll head over right after service."
Me: "Cool, I'll just order some pizzas and what not."
Mom: "Ok love you!"
Me: "Love you too, mind bringing over some extra grey paint from one our bedrooms and maybe some painter's tape and maybe a brush and some sheets to cover the floor with? Great, see you tomorrow."
Mom: ...Ok.

So, at 1:00pm we were in the apartment watching the Raven's. Ok, well Andrew,  my dad and my sister were watching the Ravens and my mom and I were taping stripes on the rug to be painted right in front of them.

Exhibit 1:

This is me, painting the rug while Andrew is watching the game. You can't see my Dad in this picture, but I am sitting directly in his line of sight as he is getting very feisty about the Ravens not using their time-outs and challenges appropriately. I just hummed quietly to myself. Also - side note: if you are painting stripes, you might want to consider what size your rear-end is because if you make the stripes as wide as you are it is much easier to sit in between and paint. I did not follow this rule, there are some pictures out there (that live in the cell phone of my Mom) of me in all kinds of weird straddling positions trying to get the paint on this rug! Keep in mind, it wasn't even half time or anything...we were nearing the beginning of the fourth quarter at this time...

So anyway, this project is actually crazy easy. We took painters tape and marked out stripes on the rug. My mom taught me that you need to make the center stripe first and work out from there. I didn't use any precise measure for the stripes, I just used a book I had laying around and thought looked like the appropriate width.  The taping takes the longest amount of time. Make sure the tape comes down over the edges and underneath the rug and spend a few minutes pressing the tape down into the rug.

Also important to consider, the width of the tape will be included in the white stripe, so make sure that when measuring and placing the tape that in order to make all of them the same size, every other stripe will look thinner because this is the white stripe with the tape included in its size.

After laying the tape down we used some old latex paint from my sister's room. It was flat, but I could imagine that a semi gloss or gloss paint would work fine. I painted two coats on the rug and could have painted more if the end of the Raven's game wasn't quickly approaching.  I also failed to mention that my house guests (my Dad and sister) and my husband were trapped on the couch and couldn't necessarily get up because the rug was taking up the entire floor. See below.

 
They look thrilled. I took this picture on my phone (hence the not so great quality) and sent it out to all of my friends...the text replies I got back were "wow...everyone looks THRILLED about your rug." But now you can see how much space my craft was taking up on Football Sunday.

Everyone loved how it turned out (although you cannot see that in the picture above.) It was such a quick room transformation. The rug from Ikea is pretty good quality, is thick enough to stay still on the floor and the paint doesn't feel weird under your feet when you walk on it. I was supposed to spray it with Scotch Guard Fabric Protector...but I went to Target and couldn't find it so I just didn't do it. It's been two weeks and it still looks great - ask me in a year, though. I recommend using the fabric protector, I will buy some when I see it and use it. (Following through is not one of my top 3 strengths I list when interviewing...)


Last comment, please do not judge the coffee table, that is one of the next Pinterest DIY crafts that we are going to attempt this weekend or next!!  It will be fabulous.